
After finishing my previous project, I decided it was time to put a temperature sensor at my daughter’s room. Despite living in Norway for a while, I still suspect it is just colder than it should be.
My goal was to transmit the temperature of her room to our Homebridge, so we could check it on our phone. I also wanted a solution that would allow me to switch the radio transmitter while not transferring data.
I had a couple of DHT11 sensors around, and I decided to try the ESP8266-01. I got them at Kjell & Co., and, as usual, when going there I end up buying more than I need, so I got this OLED screen, which I then thought I could use to display the temperature (and humidity, since the DHT11 provides that as well) without my phone.
The ESP8266 is used mainly to read the sensor and transmit the data to the computer running Homebridge. It transmits UDP packets, to make it simple. On the computer side, I use a small NodeJS app to receive the packets (and send and ACK back).
I had a couple of Arduino Mini’s at home, which I never used because they didn’t have soldered pins to the GPIO’s. But I manned up and soldered some pins to it. Not the nicest job I ever did, but nothing got broken in the process.
I added a button to the circuit, so that we could read the temperature with the touch of a button.
It works like this:
ESP8266: It keeps reading the sensor all the time, and transmitting the data via serial to the Arduino. In addition to that, the data is sent by WiFi to the Homebridge. The radio turns itself on, connects to the network, sends the packets and, upon after getting the confirmation that the packets were received, it turns itself off for 1 minute.
Arduino: It receives the temperature and humidity info fromthe ESP8266, and then it shows it on a screen. The screen is off, and is turned on for 10 seconds when a button is pressed.
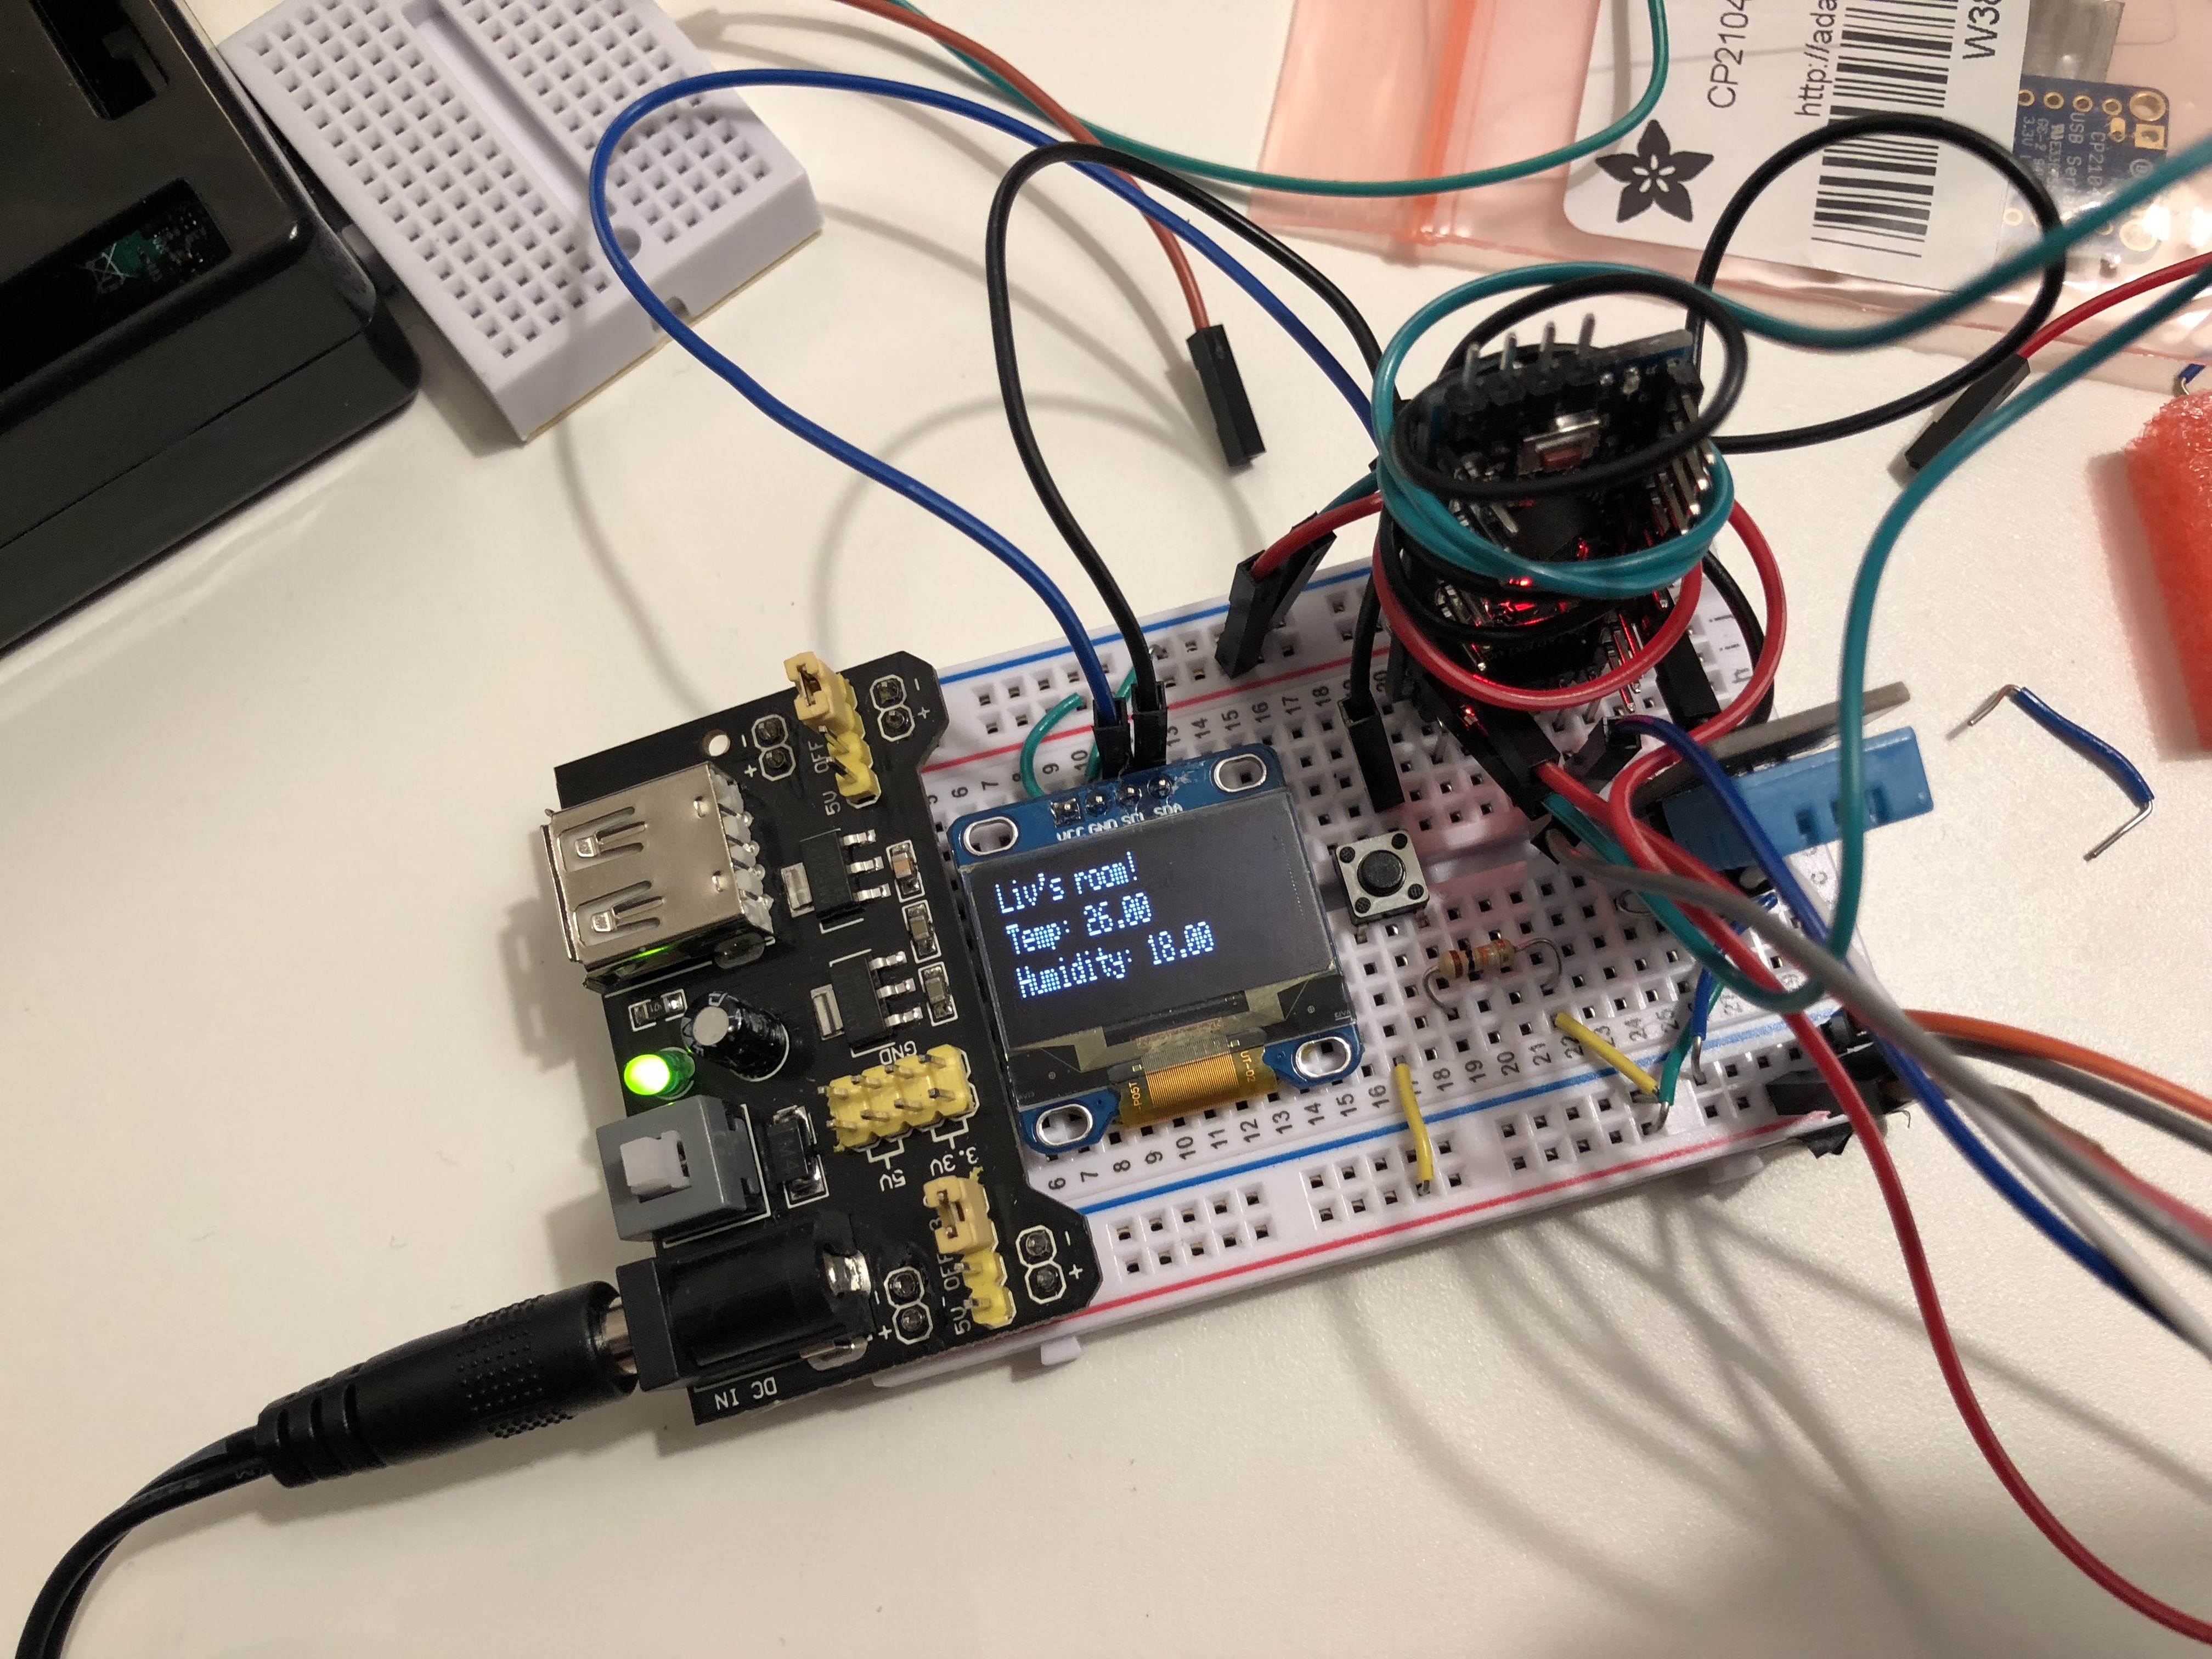
It is not very elegant, because there was no space to put the Arduino on the small breadboard. I wanna improve it later by:
- changing the power supply to a small circuit to provide power (with voltage regulator and capacitors);
- put an ATMega chip on the breadboard instead of an arduino.
- order a pcb?
- Get rid of the arduino and use a bigger ESP8266 instead.